It’s been an interesting few months. Lots of time at home. In trying to fill my time, I started working on several woodworking projects. Built a shoe rack for myself, a bookshelf/dollhouse for my kids, and most recently I went out of my comfort zone to build something I had no experience building, using materials I had never used before.
My wife sent me a picture from Pinterest of a bunk bed that divided a bedroom in two. It was designed for two girls that shared a room. One girl entered from one side into the bottom bunk, and the other girl entered the top from the other side. Each bunk had a wall that blocked access/view of the other girls’ side. That particular bed was connected to the ceiling and was able to float the top bed without any legs on one side (one side was held up by the wall, the other by the ceiling). I didn’t think that would work with our ceiling, so I set out to design something similar, but without connecting to the ceiling.
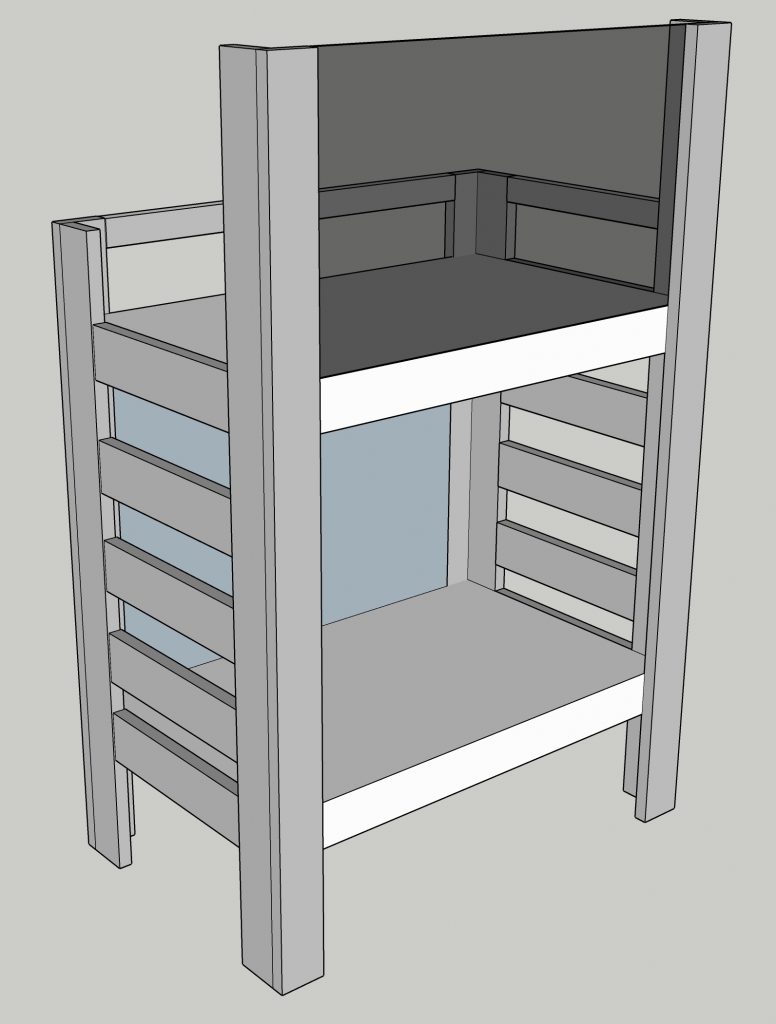
I’d love to say I came up with the above model right from the beginning, but it didn’t work out like that. I watched a few YouTube videos of people building bunk beds, and came up with the above design, mostly in my head. I had planned to diagram most of it, but as it worked out I was looking for lumberyards near me, and found one that was very helpful. On a visit where I intended only to check it out, I ended up ordering the wood. As I didn’t even have my basic diagrams or measurements with me, I stood there with a pencil and paper, a list of the pine dimensional lumber available, and figured out mostly what I needed. This meant my usual carefully planned cut lists were nonexistent.
When I build something, the design process is my favorite part. Actually, I like designing and I like the final assembly. Everything in between, especially tons of sanding and painting layer upon layer of paint, is difficult, bad for my back, and takes too long.
This project was more difficult than most because of several factors. First, it had to support two of my children without question. Second, I decided to use Pine, something I had never worked with before. My previous projects had mostly used Baltic Birch Plywood.
BBP has several very distinct advantages over Pine. First, it is very straight. There is no warping in the wood as it is engineered. Second, it has cross-oriented layers, which means I don’t have to pay attention to the grain direction. Lastly, when it says it’s a certain thickness, that is exactly what it is. It may seem odd to some, but one of the first things you learn when dealing with dimensional lumber like Pine, is that a 2×4 is not 2″ by 4″ but rather 1.5″ by 3.5″. So with Pine, you need to build based on the actual, not nominal, dimensions.
Standing there with pencil and paper, I figured out the height of the legs. Each leg would be built from two 2×6 pieces screwed together with 8 Kreg HD screws in pocket holes. The two legs on the side where the top wall was, would be as tall as possible within the room. As the room is 2.5m tall, and they had 4.8m pieces of 2×6 Pine (or rather 50×150 Pine as they call it here), I had them cut two pieces of that in half, giving me 4 pieces of 2.4m 2×6 Pine. Continuing the process I figured out the other (shorter) legs, as well as the size of the bunks. Everything so far was using the same 2×6 Pine. I added some 1×4 Pine for the slats to hold up the mattresses, and some 2×2 Pine to hold up the slats. I also used pieces of 2×2 Pine in each corner to hold up the bunks during assembly, before I secured them with bolts.
After going over my math, and figuring out the least number of pieces of wood that needed to be cut, I gave them my order, which they said to pick up the next morning. If you’re wondering why I had the lumberyard cut everything for me, it’s because I don’t own any kind of circular saw (table, miter, or any other kind). Basically I was praying my back-of-a-scrap calculations were correct. Here’s what I picked up the next day:
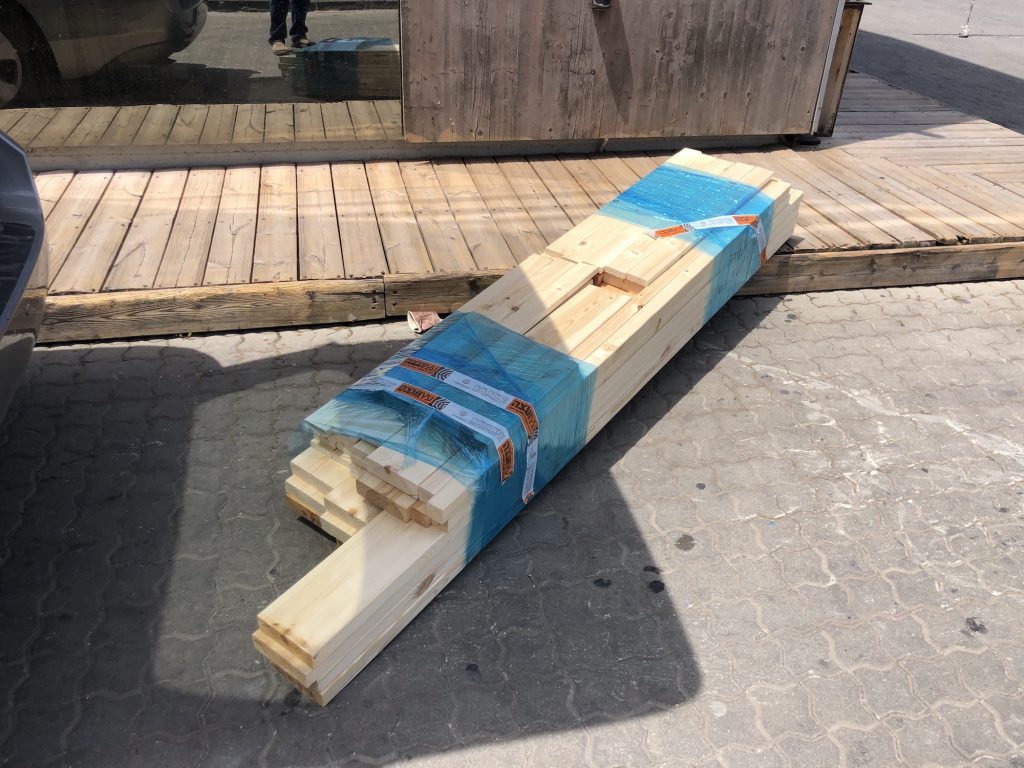
As I mentioned, one of the downsides of Pine is that it is sometimes warped. If I had spent the time selecting each piece of wood, and making sure it was perfectly straight, the rest of the project might have been easier. I didn’t have the option to do that, however, so a lot of work was getting everything to be straight.
At this point my whole family saw the pile of wood in the backyard (I have no saw because I have no workshop, so all my work goes on in my backyard or my living room). My daughters didn’t quite understand what I was building, which is when I created the computer model above to try to explain it to them.
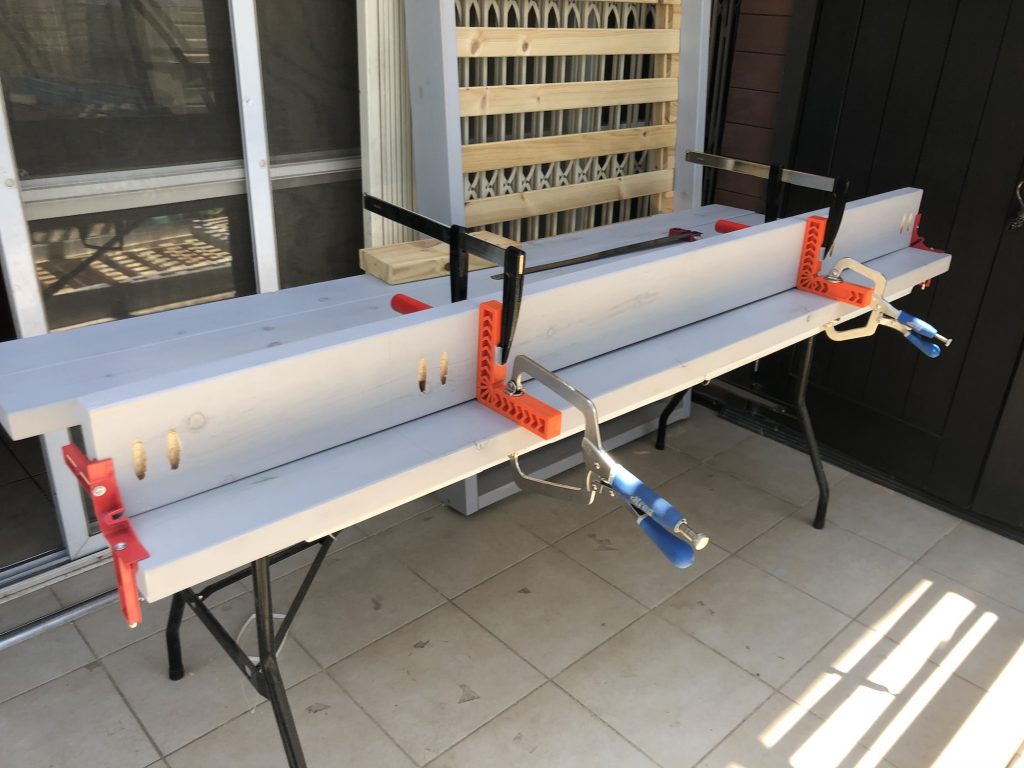
I won’t go into everything I had to do, but the hardest part was getting the bunks to be (almost) perfectly square, when the pieces I was using to assemble them were not actually straight. This required a lot of elbow grease and clamps, just to get everything aligned before the screws were added to hold things in place. In the above photo you can see a finished bunk leaning against the wall, and a leg all clamped up ready to be screwed together. Don’t let anyone tell you that you have too many clamps.
After assembling the legs and the bunks, I brought them up to the room for assembly.
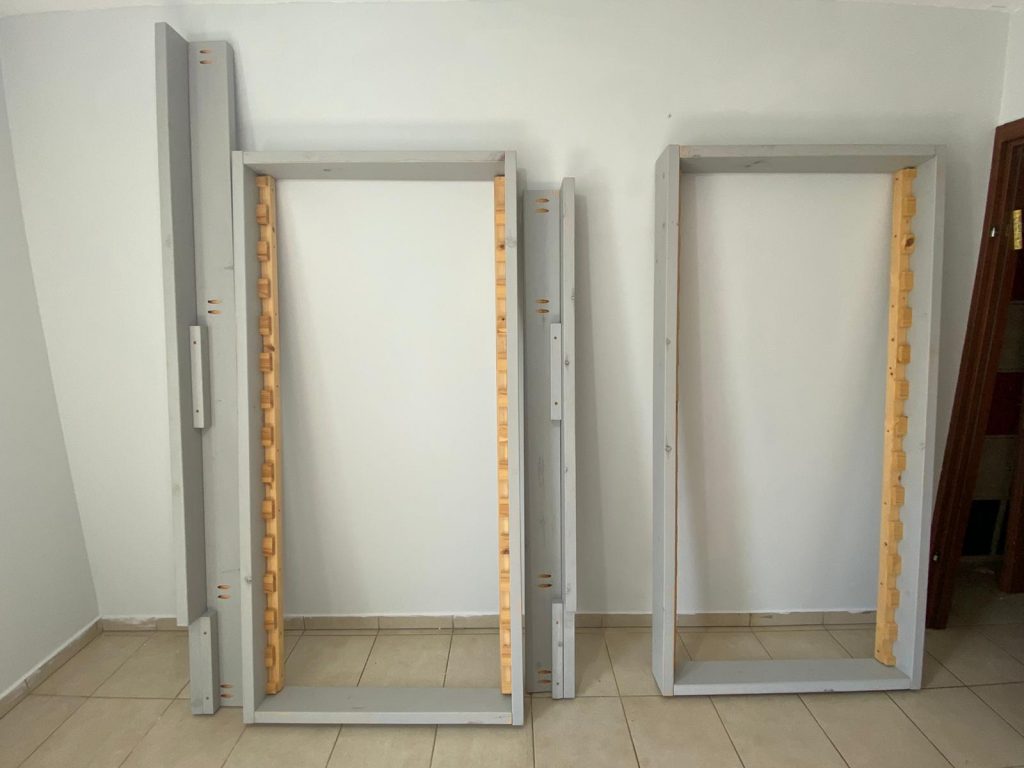
Close observers might have noticed the notches cut out of the bottom of the legs, meaning the bottom of each leg is not as wide as the top. That was done to make room for a pull-out bed underneath the bottom bunk. That bed can pull out in either direction, depending on which girl is having a sleepover. To get the bed to fit, however, required an extra couple of inches on each side – thus the notches.
You might also notice the two pieces inside the corner of each leg, right below where each bunk will go. Also notice that two sets of pocket holes are right above those pieces, where the bunk will be, so those sets of pocket holes will be covered up by the bunks.
Here’s the bed put together with clamps. I’m sitting on it, so even without bolts holding it together, it can at least support my weight. Remember, you can never have enough clamps.
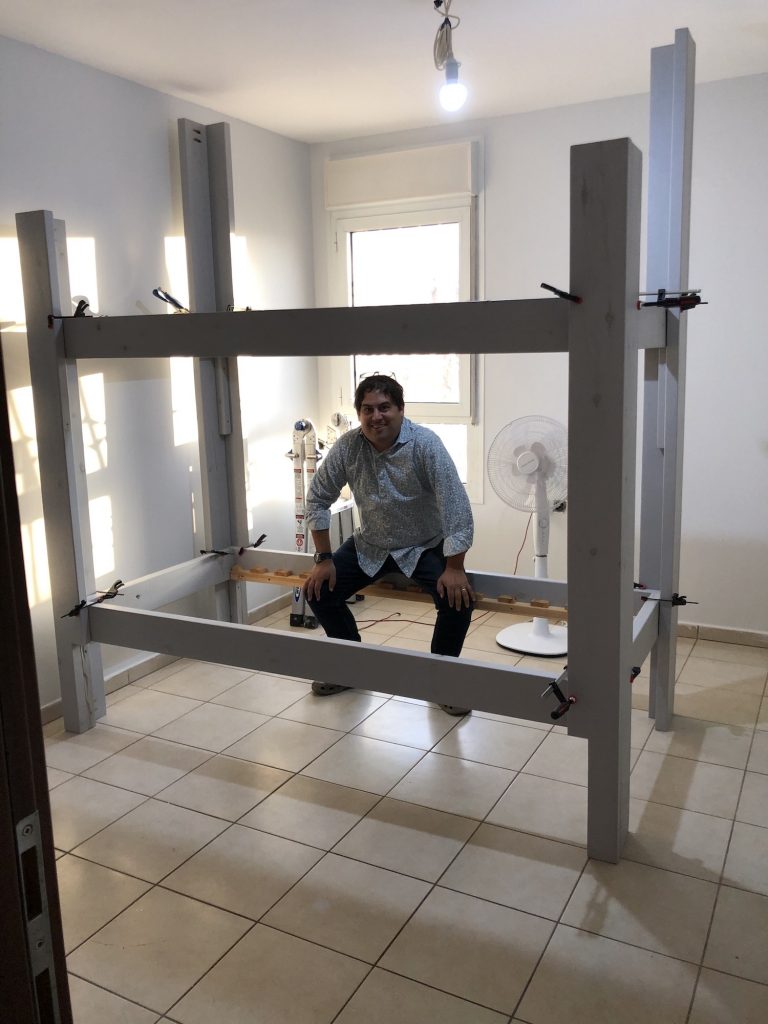
What’s important about this stage is that even without the bolts it feels really secure and very straight. I’ll skip ahead now, but the next step was drilling very straight holes through the legs and bunks together, and inserting carriage bolts, something I had also never done before. Each corner of each bunk got two bolts, which meant a lot of drilling and a lot of bolts. The bolts needed to be long enough to go through both the leg and the bunk, as well as accept a washer and nut, but not any longer.
The result:
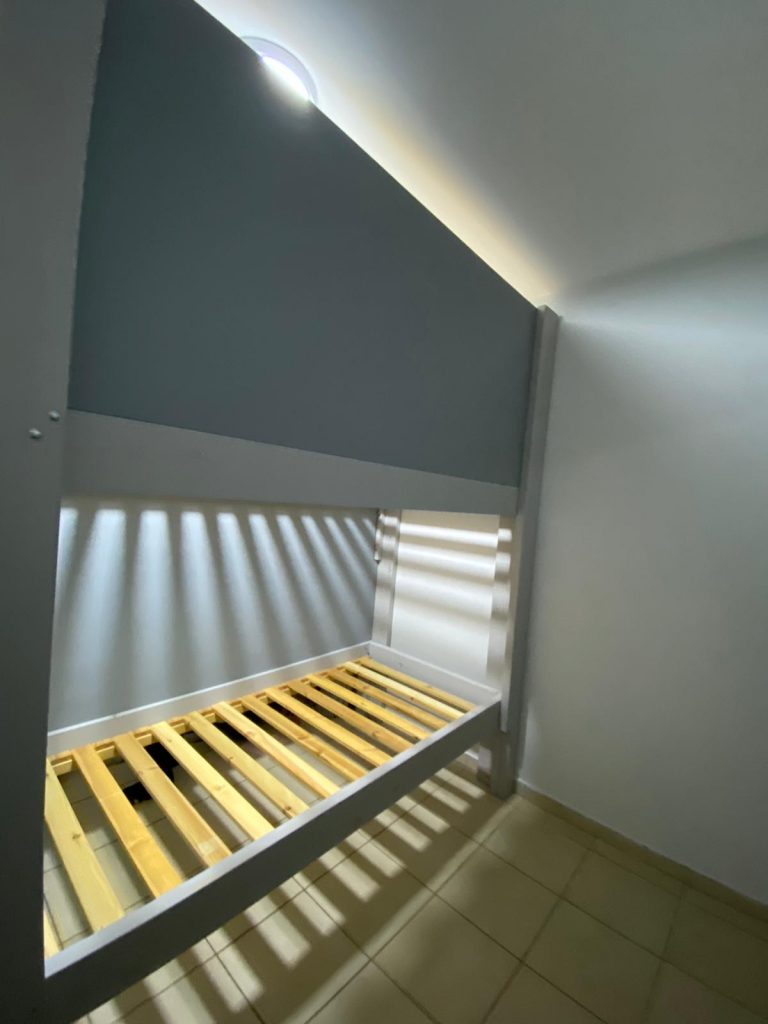
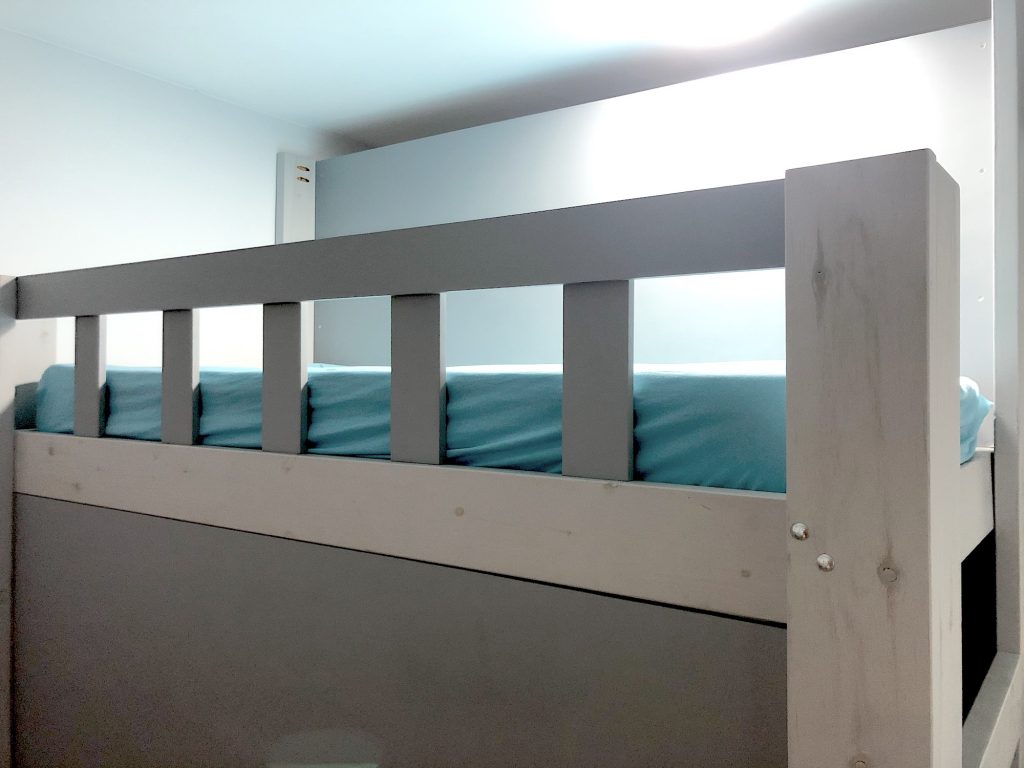
What I can say is that my initial primary concern that it would be safe for my children is satisfied, as this bed is a tank. Even without the two-meter-long solid walls on either side, this bed weighs a ton. The weight is evenly distributed, and stepping on any point doesn’t make the bed move or tilt at all. And that’s me. My children are not affecting this bed at all, unless they maybe invite their whole class to sit on one side of it (luckily COVID-19 prevents that from happening in case they’re reading this and get any ideas). I might bolt the whole thing to the wall, but frankly it’s not necessary. Unless someone is actively trying to move the bed, it seems like it is bolted.
And now ends the story of my COVID-19 bunk-bed-building experience. Let’s call this a small silver lining of this whole mess, getting to build something like this for my children that I would otherwise not have had the time to do. Let’s take small victories where we can get them.